Setting Up SSO with Google Workspace
This guide will help you configure Single Sign-On (SSO) for your organization using Google Workspace. When enabled, users with your organization's email domain can sign in seamlessly using their Google accounts and will automatically be added to your organization on LangDB.
Step 1: Navigate to User Management
From your LangDB dashboard, click on "Manage Users" in the left sidebar navigation menu.
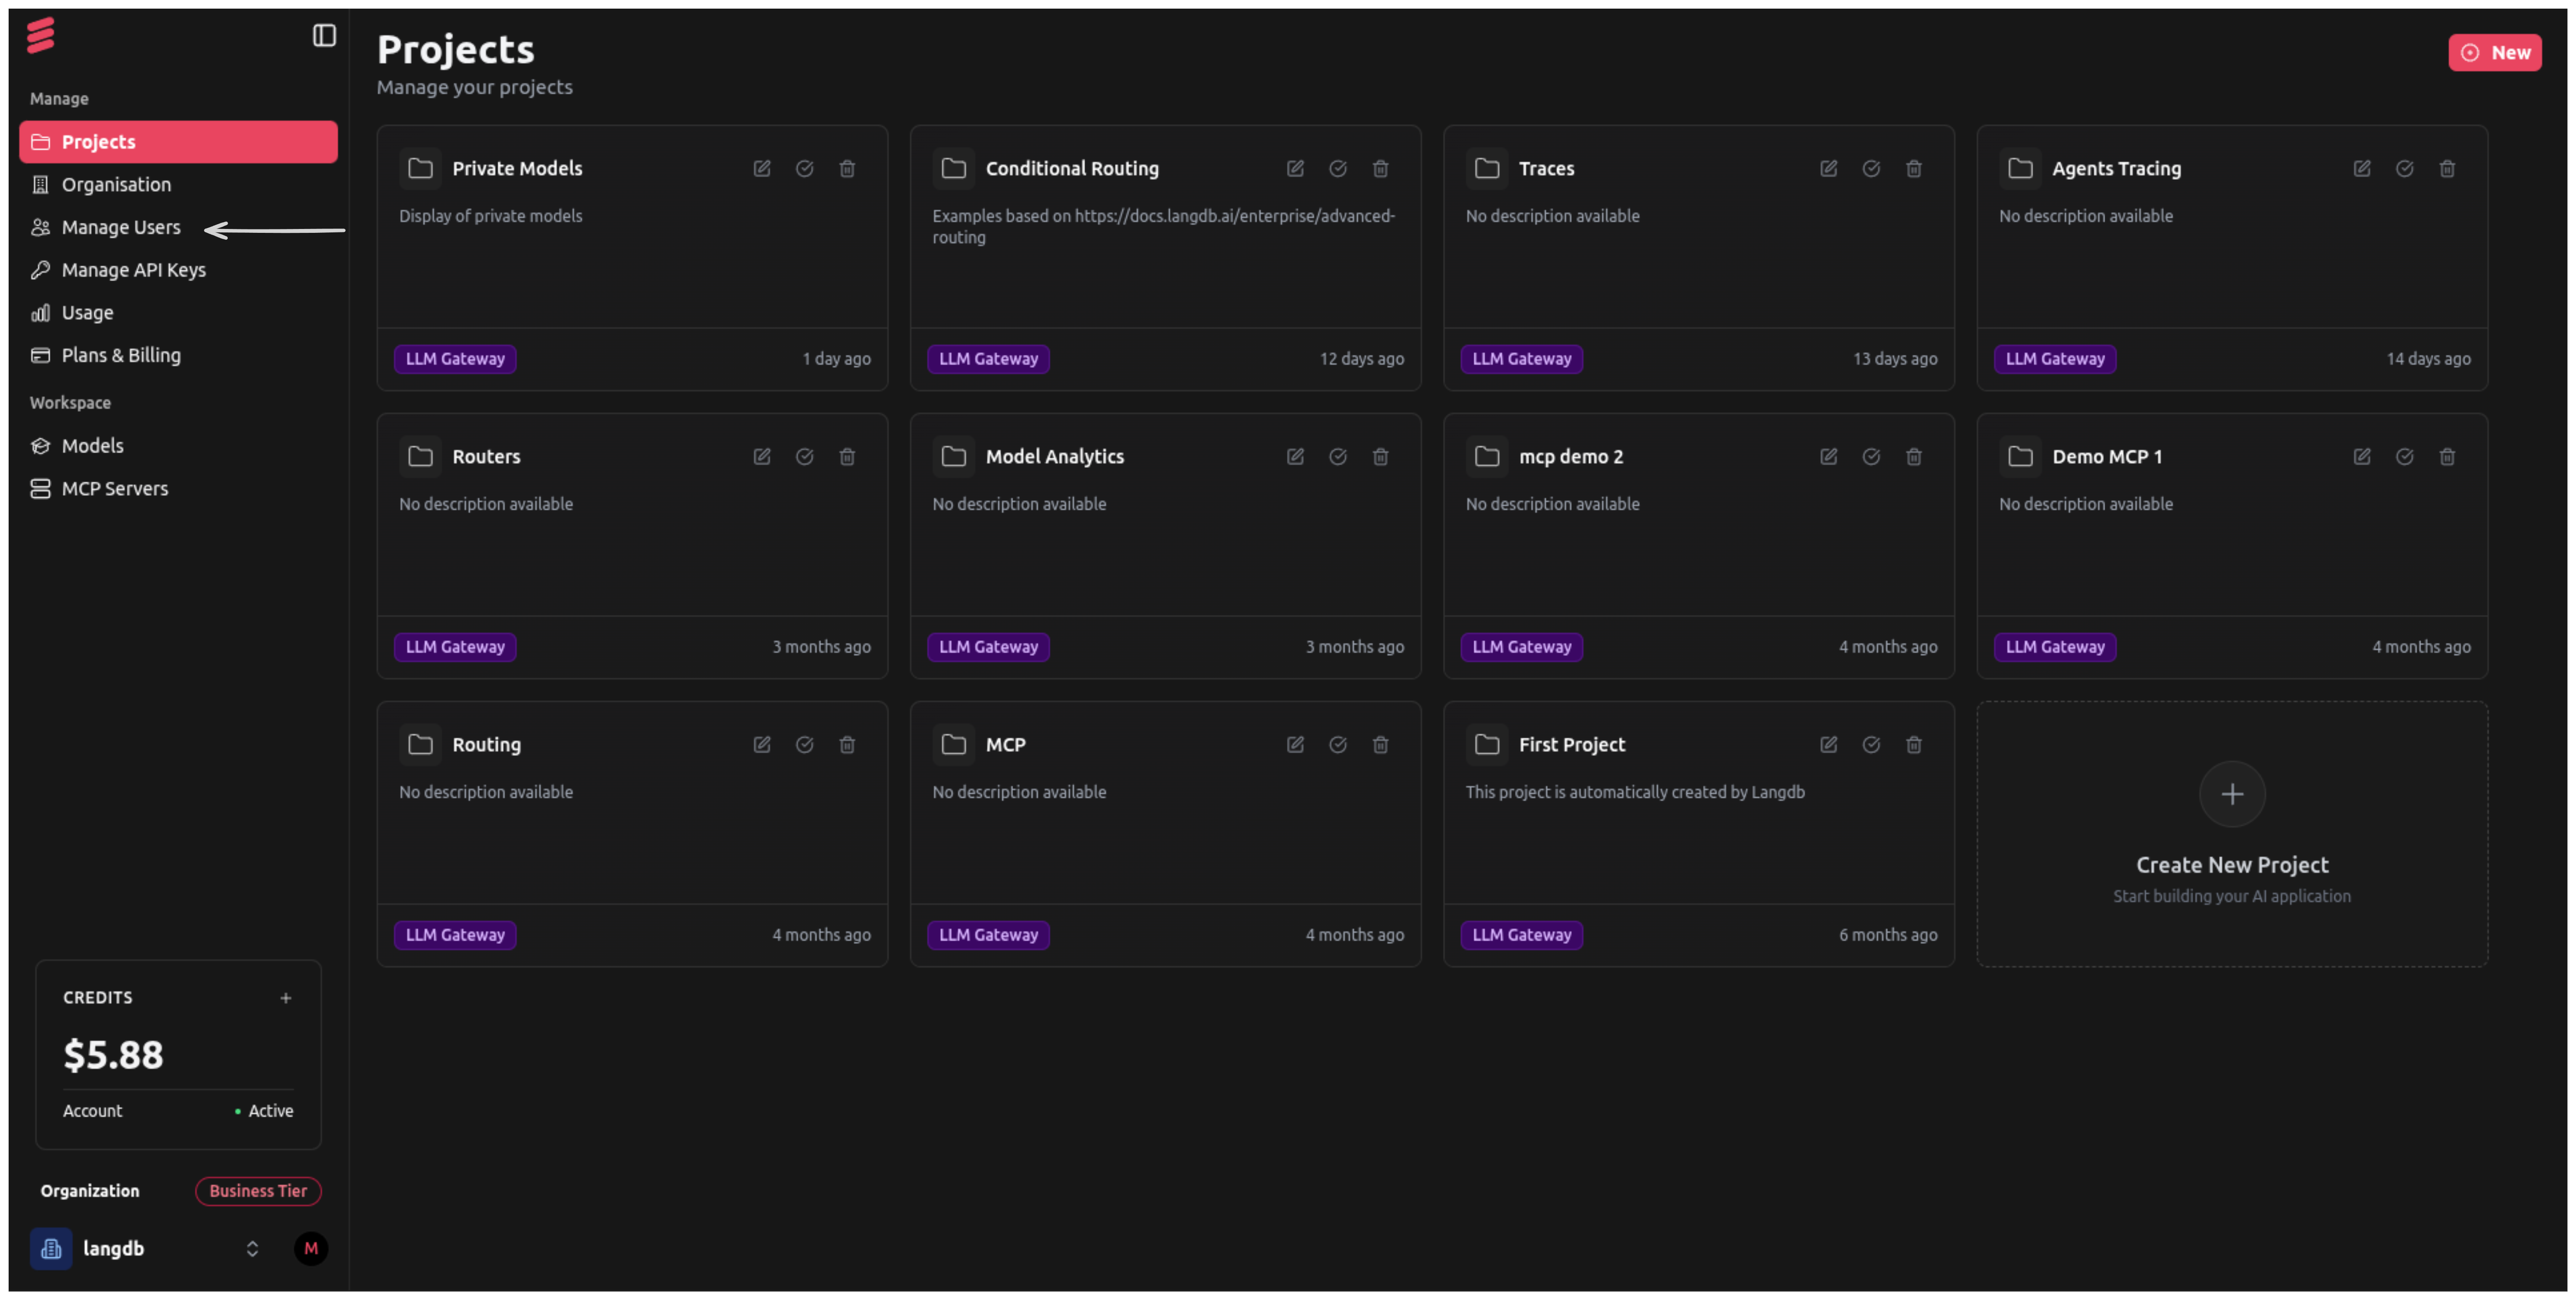
Navigate to Manage Users
Step 2: Access SSO Configuration
On the User Management page, locate the "Enable SSO" checkbox in the top right corner, positioned below the red "& Invite" button. This setting controls whether SSO is enabled for your organization.
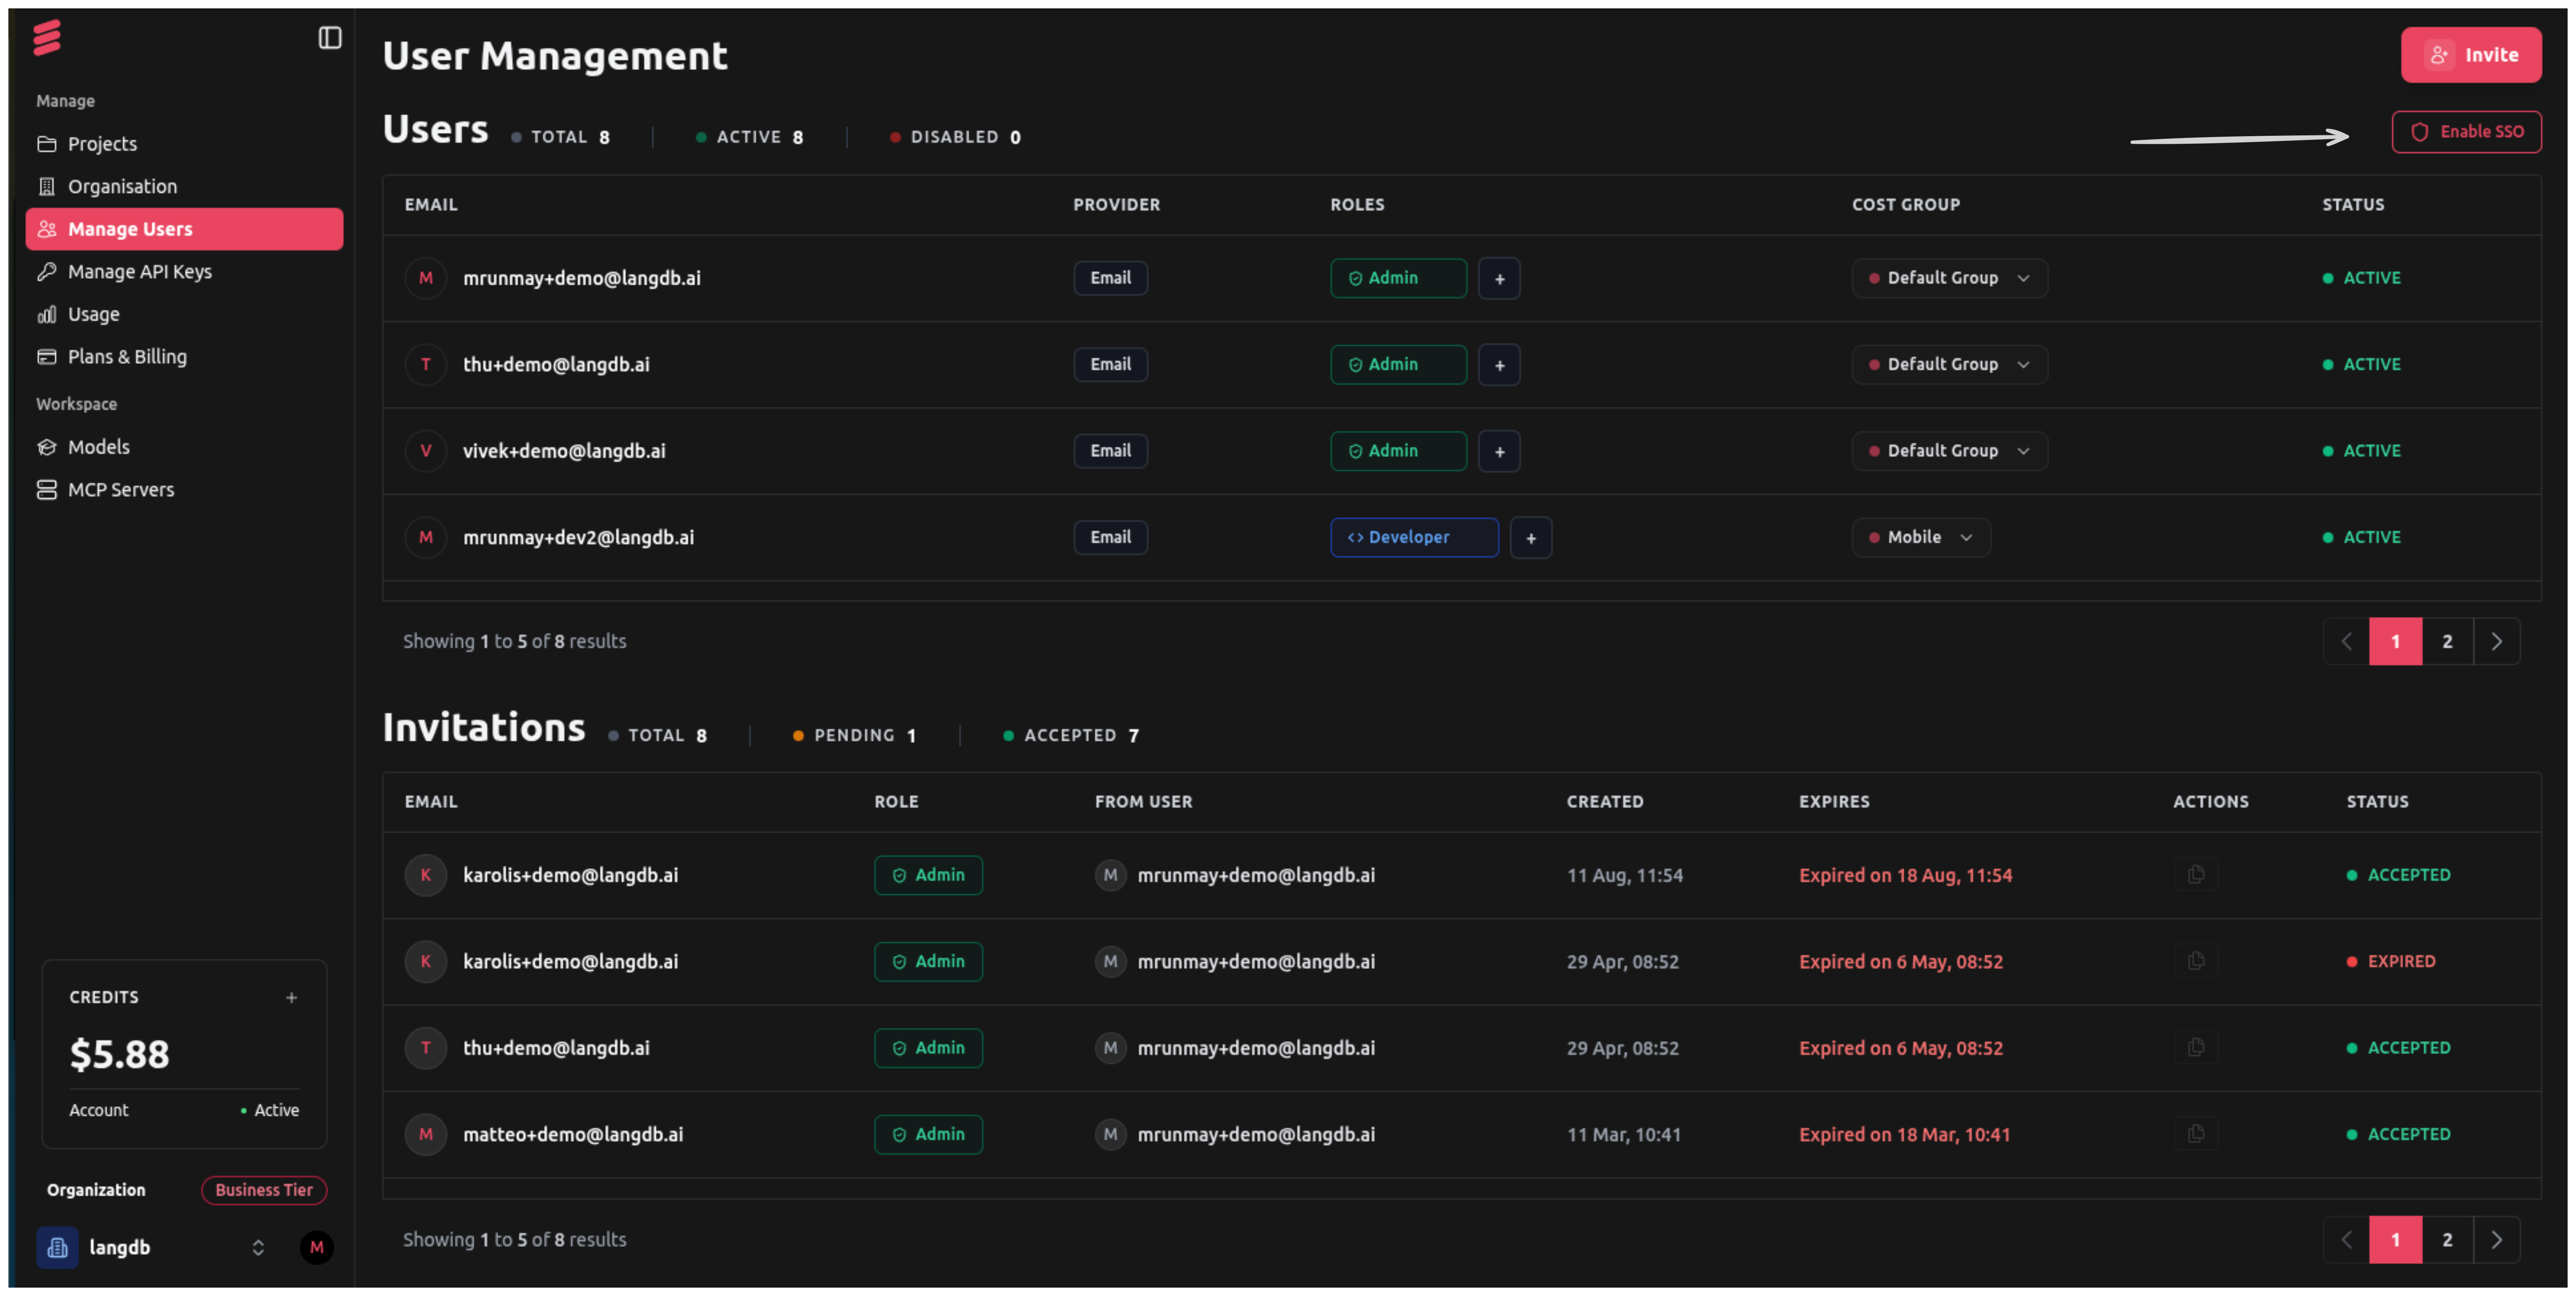
User Management Page with SSO Option
Step 3: Configure SSO Settings
Enable the SSO Authentican here. Once saved, all users with your organization's email domain will be able to sign in using Google SSO and will automatically be added to your organization.
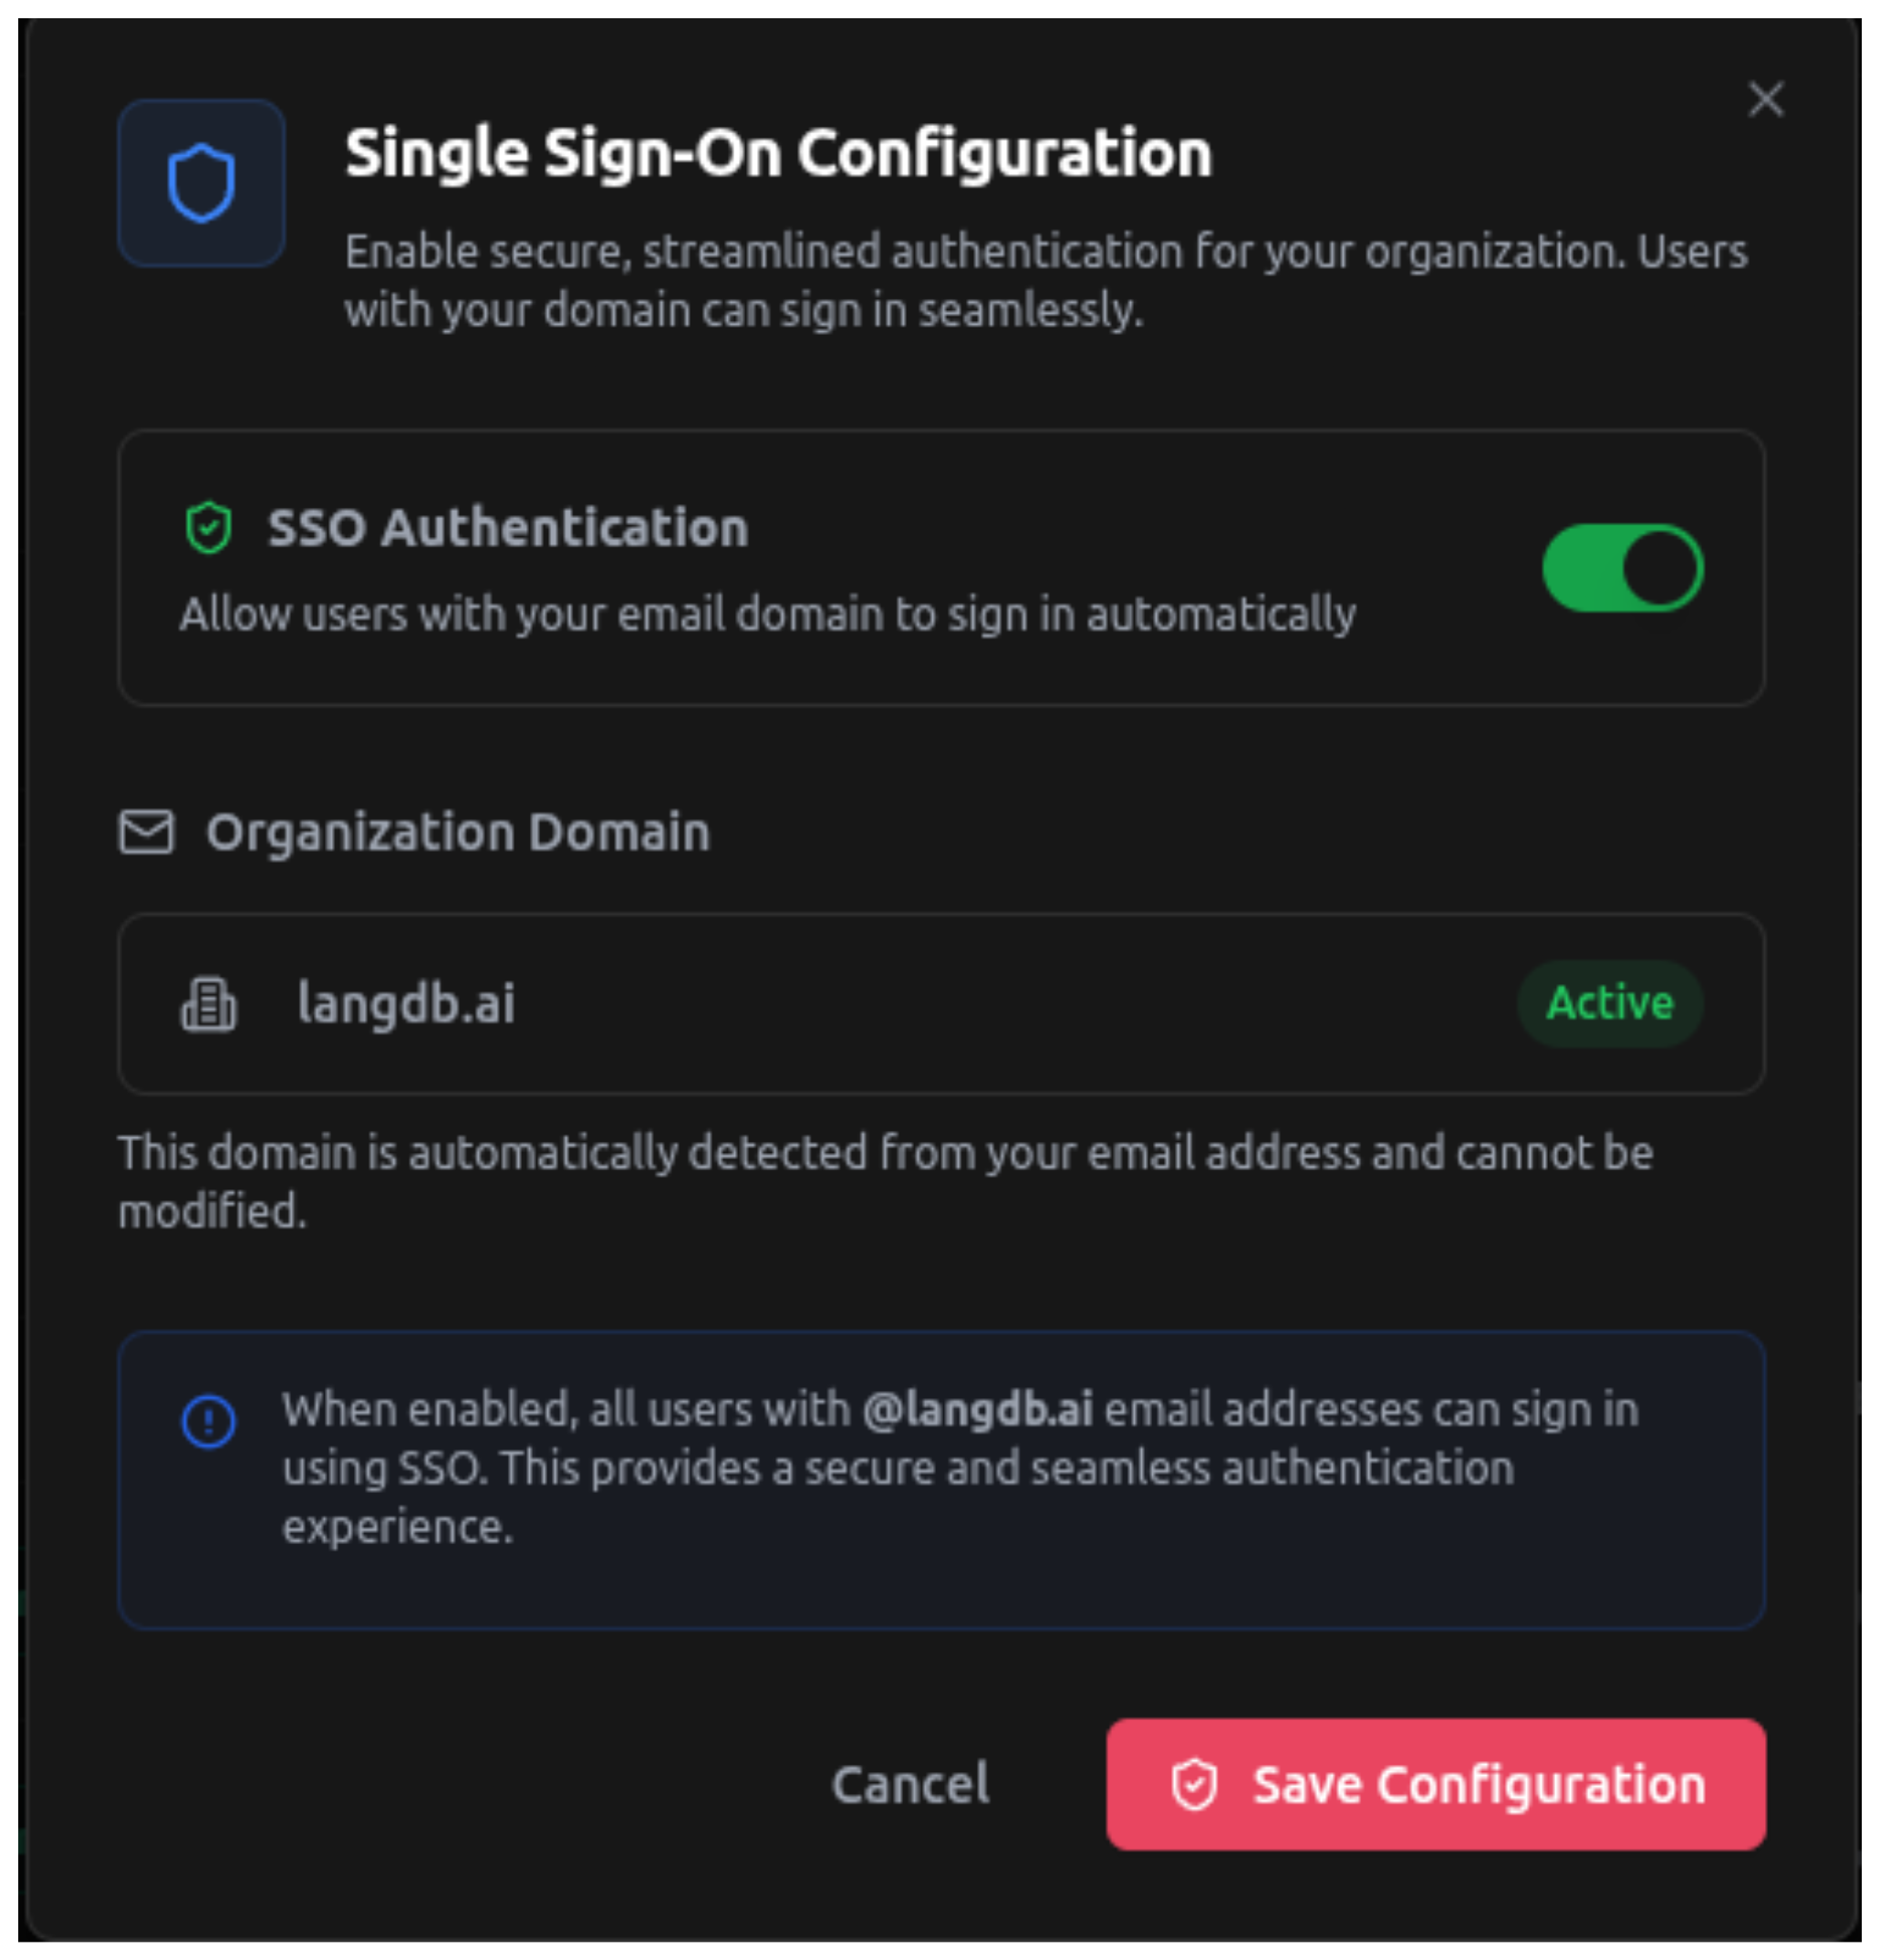
Save SSO Configuration
How It Works
Once SSO is configured:
- Automatic User Addition: When someone with your organization's email domain (e.g., @langdb.ai) signs in using Google, they will automatically be added to your LangDB organization.
- Seamless Authentication: Users can sign in using their Google Workspace credentials without needing separate LangDB accounts.
- Domain Verification: The system automatically detects and uses your organization's domain for user identification.
Important Notes
- Domain Detection: Your organization domain is automatically detected from your email address and cannot be changed.
- User Management: All users with your domain will be able to sign in automatically once SSO is enabled.
- Security: SSO provides a secure and streamlined authentication experience for your organization.